![]()
Printing with page arrangement for basic printing
The Page Arrangement Dialog
To activate the Page Arrangement Dialog, click on the Printer Icon on the tool bar.
Then click on the Arrange Catalog Item button in the next dialog box.
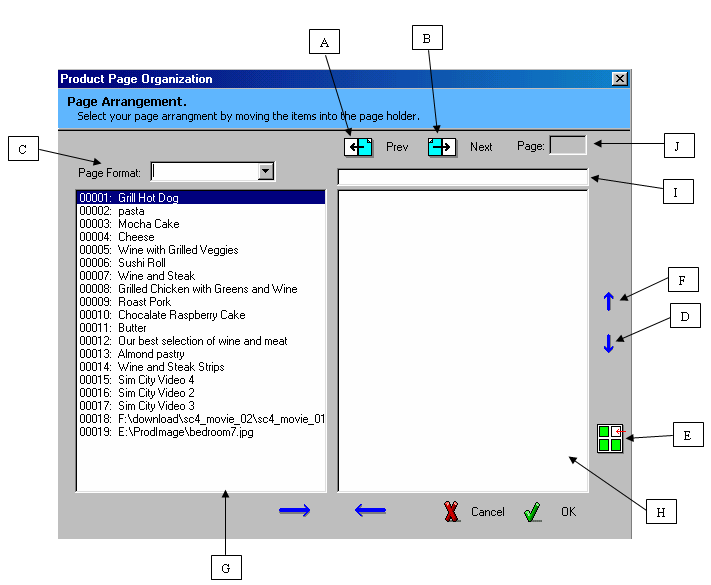
Object meaning:
[A]: Move to the previous page.
[B]: Move to the next page.
[C]: The page format to be use when print this arrangement.
[D]: Move the selected item down on the Page Holder
[E]: Insert blank Items unto the Page Holder (blank items can not be moved up or down from their position).
[F]: Move the selected item in or out of the Item Holder.
[G]: Item Holder. Contains a list of items that are not assigned to any particular page.
[H]: Page Holder. Contains a list of items that are assigned to a particular page indicated by the Page Number.
[ I]: Page Heading. This field allows you to enter the header for the current page. Page 1 must always have a
header.
[ J]: Page Number Indicator.
The Page Arrangement feature will allow you to move items to and from the Page and Item Holders.
To move the items between holders, you will need to select the item and click on of the move arrows at the bottom of the dialog. The item will then appear in one of the two holders, depending on the arrow that was clicked.
The Page Holder will represent 1 page of an 8 ˝ by 11 piece of paper. The Item holder represents items that are currently not assigned to a page. You are able to move as many items into the Page Holder up to the maximum number of items that are allowed on a page. The maximum number of items allowed, is determined by the Page Format field [C]. The Page Format Field contains the same options found on the print format dialog.
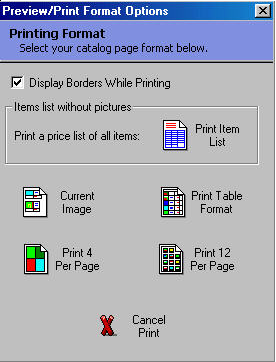
For example: Setting a page format of 4 Per Page, will allow you to move a maximum of 4 items including blank items into the Page Holder. Setting a Page Format of 12 Per Page, will allow up to 12 items on the page holder. The amount of items that will be printed is controlled by the Print Format (see picture below).
In order to use the Page Arrangement effectively, you must select the same Page and Print formats so that the arrangements on the Page Holder are in sync when printing.
Using the Icon [E], blank items can be inserted into the Page Holder to represent items that have no data.
Different pages can be viewed by selecting the NEXT or PREV icons [A & B] on top of the Page Holder, the Page Holder will display different items depending on the page number. The Page Number [J] will also change to display the number of the page. Each pages can contain it's own heading by adding text to the Page Heading field [ I ].